
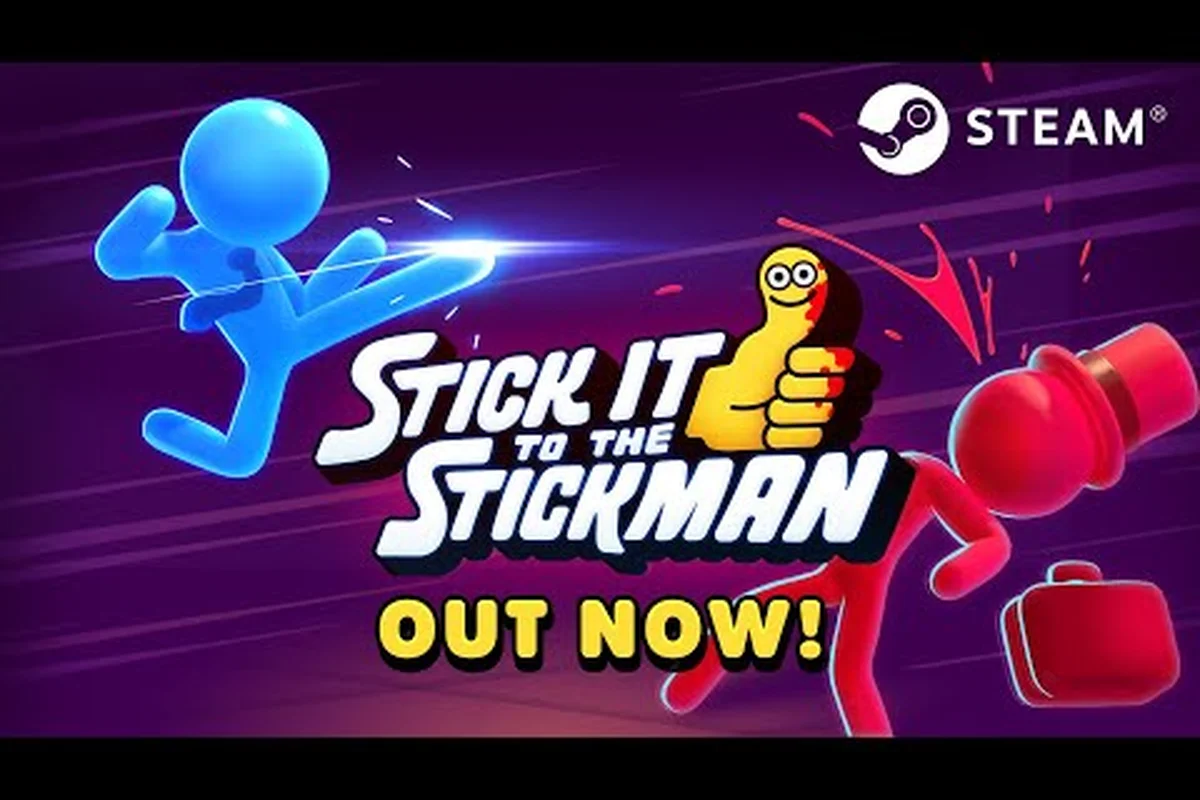
The Stick It to the Stickman shuriken toss is the franchise's signature ranged opener, and mastering it turns every office floor into a dodge puzzle you control. Tossed ninja stars, chained pistol shots, and even mail-borne explosives all trace their damage profile back to that first spinning projectile, so understanding its arc, cooldown, and perk interactions is the difference between a clean run and a crumpled memo graveyard. This guide covers every ranged and explosive variant that branches from the shuriken, the tiers they evolve through, and the combat portfolio slots where they shine brightest.
Shuriken Toss Fundamentals and Tier Evolution
The base shuriken throw in Stick It to the Stickman launches a spinning office-supply star that travels roughly 18 meters before losing momentum, hitting up to three enemies on a straight line and applying a 0.4 second stagger on contact. The move occupies the Light Ranged slot in your combat portfolio and shares its input binding with every other projectile you unlock later in the archetype progression tree.
According to the Stick It to the Stickman on Steam store page, the game ships with 100+ combat moves spanning 9+ archetypes, and every ranged attack routes through the same 3-tier evolution system. The shuriken is no exception: Tier 1 is the basic toss, Tier 2 adds a fan of two stars with reduced accuracy, and Tier 3 unlocks a ricocheting pentastar volley that bounces off walls twice for a maximum of five hits.
| Tier | Projectile Count | Max Hits | Stagger Duration | Special Property |
|---|---|---|---|---|
| Tier 1 — Basic Toss | 1 star | 3 | 0.4s | None |
| Tier 2 — Twin Fan | 2 stars | 4 | 0.4s | 25° spread cone |
| Tier 3 — Ricochet Volley | 5 stars | 5 | 0.6s | 2 wall bounces |
The ricochet volley is where the move becomes a room-clear tool rather than a single-target poke. A skilled player can clear an entire break room by aiming at the nearest wall angle, then watching the stars carom through cubicle dividers, file cabinets, and the unfortunate intern who thought hiding behind a water cooler was a viable strategy. The tier 3 version also benefits from the Smoke Form perk because the brief invisibility frames line up perfectly with the 0.6 second stagger window.
Combat Portfolio Placement
Your combat portfolio in Stick It to the Stickman holds four move slots at the start of a run, expandable to six with the right perks. The shuriken toss slots cleanly into Slot 2 (Ranged Opener) because its fast animation lets you cancel into a melee follow-up without losing combo potential. Community testing on the Free Lives Official Discord shows that pairing the shuriken with the flying kick in slot 1 creates the most reliable air-to-ground juggle because the kick launches enemies upward right into the projectile's arc.
Pistol Shot Chain and Firearm Synergies
The pistol shot chain is the natural ranged follow-up once your shuriken toss has softened a group, and it lives in the same evolutionary tree under a different unlock node. Tier 1 fires a single slug dealing moderate damage with no travel cap, Tier 2 chains two shots in rapid succession for 1.5x combo multiplier, and Tier 3 unleashes a five-round burst that pierces through any enemy under the Confused status effect. The chain is best slotted in Slot 3 (Combo Extender) because the input rhythm lines up with the shuriken's recovery frames.
| Pistol Chain Tier | Rounds | Combo Multiplier | Best Pairing | Status Interaction |
|---|---|---|---|---|
| Tier 1 — Single Shot | 1 | 1.0x | Shuriken Toss | None |
| Tier 2 — Double Tap | 2 | 1.5x | Dropkick | Confused enemies take +30% damage |
| Tier 3 — Five-Round Burst | 5 | 2.2x | Flying Kick | Pierces Confused + Staggered |
When the pistol shot chain reaches Tier 3, it becomes one of the highest sustained-damage ranged options in the game because the burst rate matches the shuriken's cooldown almost perfectly, which means you can alternate projectiles without ever dropping your combo counter. The five-round burst also benefits from the Titanium Cranium perk because the headshot damage bonus stacks with each individual round for a theoretical 3.4x headshot multiplier on a fully buffed build.
Why the Chain Matters for Crowd Control
The shuriken toss handles the opening scatter because it can hit up to three targets in a line, but the moment enemies start closing distance, the pistol chain takes over and keeps the pressure on while you reposition. This rhythm is what experienced players call the ranged shuffle, and it relies on understanding that ranged moves in Stick It to the Stickman do not stagger you out of your own recovery animation the way melee strings sometimes do. The chain therefore functions as a tempo tool as much as a damage source, especially against the floor-specific minibosses found in the Marketing Department and IT Support wings.
Shotgun Blast Move and Close-Quarters Coverage
The shotgun blast move is where the shuriken family pivots from finesse to brute force, trading the long-range poke for a devastating 8-meter cone of spread that can one-shot basic clerks and severely chunk mid-tier managers. According to the official Stick It to the Stickman website, every strike interacts with the proprietary physics engine, and the shotgun blast is one of the most visually expressive examples because the spread pellets carry individual ragdoll momentum, often launching lighter enemies into environmental hazards.
| Shotgun Variant | Spread Pattern | Pellets | Effective Range | Tier 3 Bonus |
|---|---|---|---|---|
| Tier 1 — Sawed-Off | Wide cone | 6 | 6m | Knockback |
| Tier 2 — Combat Shotgun | Tight cone | 9 | 10m | +15% armor penetration |
| Tier 3 — Auto-Shotgun | Adjustable | 12 | 12m | Cycles automatically every 0.3s |
The Tier 3 auto-shotgun is widely considered one of the strongest boss DPS tools in the game because the 0.3 second cycle matches most boss vulnerability windows, which means you can pour continuous pressure into a stunned Chief Security Officer without ever resetting your attack timer. The shuriken toss remains the opener, but the auto-shotgun takes the kill credit on most high-floor encounters once perks like Metal Arms reduce your weapon swap penalty to zero.
Shotgun vs Shuriken: When to Switch
A common mistake new players make is treating the shotgun as a direct upgrade to the shuriken toss, when in reality the two moves serve completely different tactical roles. The shuriken is your kiting tool for corridors and open floors where you need to keep distance, while the shotgun is your punish tool for tight rooms and ambush points where enemies have already closed the gap. Keeping both slotted in your portfolio gives you a dynamic answer to whatever the procedural level generator throws at you, and the r/Stickittothestickman tier list consistently ranks dual-ranged loadouts above pure-melee builds for the top Corporate Ladder floors.
Machine Gun Volley and Sustained Suppression
The machine gun volley takes the pistol shot chain concept and stretches it into a 3-second continuous stream of low-damage rounds that excels at stripping armor and applying the Suppressed debuff. Tier 1 fires at a steady rate, Tier 2 increases the rate of fire by 30%, and Tier 3 adds a spinning barrel that lets you walk while firing without losing accuracy. The volley occupies a unique niche because it is the only ranged move in the shuriken family that scales linearly with Fire Rate perks rather than flat damage perks.
| Machine Gun Tier | Duration | RPS | Suppressed Duration | Movement While Firing |
|---|---|---|---|---|
| Tier 1 — Standard | 3.0s | 8 | 2.0s | -40% move speed |
| Tier 2 — Accelerated | 3.0s | 11 | 2.5s | -25% move speed |
| Tier 3 — Spinning Barrel | 4.0s | 14 | 3.0s | Full mobility |
The Tier 3 spinning barrel is the build-around centerpiece for what the community calls the suppression engineer archetype, which leans on the Suppressed debuff to amplify follow-up damage from the shuriken toss and the pistol shot chain. Because Suppressed enemies take 40% bonus damage from all sources, the machine gun volley effectively functions as a global damage amplifier for the rest of your portfolio, making it an ideal opener when you know a tough wave is incoming.
Ammo and Heat Management
Unlike the shuriken toss, which is cooldown-based, the machine gun volley uses a heat meter that fills as you fire and dissipates when you stop. Overheating locks you out of all ranged moves for 4 seconds, which is more than enough time for a closing manager to land a punishing melee combo. Skilled players therefore tap-fire the volley in 1.5-second bursts to maintain pressure without crossing the heat threshold, and the Stick It to the Stickman on Steam launch showcase trailer highlights this rhythm as a featured advanced technique.
Mail Bomb Explosive and Area Denial
The mail bomb explosive is the first true area-of-effect move in the shuriken evolutionary tree, and it functions as a throwable that detonates after 1.2 seconds or on direct enemy contact. Tier 1 throws a single envelope, Tier 2 adds bounce charges that ricochet off the floor once, and Tier 3 throws a stacked parcel that splits into three smaller bombs on detonation. The mail bomb is the move you reach for when the procedural generator fills a room with six or more low-tier clerks, because the explosion radius covers most standard cubicle layouts.
| Mail Bomb Tier | Charges | Explosion Radius | Detonation Type | Status Applied |
|---|---|---|---|---|
| Tier 1 — Single Envelope | 1 | 4m | Contact + timed | Burned (3s) |
| Tier 2 — Bounce Charge | 1 | 4m | +1 floor bounce | Burned (4s) |
| Tier 3 — Stacked Parcel | 3 | 3m each | Splits on detonation | Burned (5s) + Confused |
The Tier 3 stacked parcel is the most reliable wave-clearing tool in the game, and it pairs exceptionally well with the shuriken toss because the stars can detonate the parcel mid-flight if you time the throw right, which triggers an early detonation bonus worth roughly 25% extra damage. This combo is the foundation of what speedrunners call the postal route, where every wave is dissolved by a single well-timed shuriken-mail detonation.
Burned Status and Crowd Control
The Burned status applied by the mail bomb ticks for 8 damage per second for the listed duration and prevents enemies from using their special abilities while active. Because most managers and clerks have at least one cooldown-based special, the mail bomb effectively removes a major threat vector from the encounter, which is why it ranks so highly on community tier lists. Pairing the bomb with the explosive diarrhea attack is a strategy you will see in the next section, and it leans on the same Burned-stacking principle.
Explosive Diarrhea Attack and Debuff Stacking
The explosive diarrhea attack is the strangest move in the shuriken family, and it is unlocked through the Caffeine Addict archetype progression that the r/Stickittothestickman community has identified as the top speedrunning worker. Tier 1 releases a short-range burst that applies Soaked and Burned simultaneously, Tier 2 increases the radius and adds a Toxic tick, and Tier 3 unlocks a chain reaction that spreads the Soaked debuff to nearby allies of any affected target.
| Explosive Diarrhea Tier | Radius | Debuffs Applied | Tick Damage | Spread Mechanic |
|---|---|---|---|---|
| Tier 1 — Burst | 3m | Soaked + Burned | 6/s | Single target |
| Tier 2 — Wide Spread | 5m | Soaked + Burned + Toxic | 8/s | Hits up to 3 targets |
| Tier 3 — Chain Reaction | 5m | All three + Stun | 10/s | Spreads to adjacent enemies |
The Soaked debuff is the linchpin of the build because it amplifies Burned damage by 50% and creates a multiplicative interaction with the Toxic tick for devastating sustained output. The Tier 3 chain reaction then spreads the entire debuff stack to any enemy within 2 meters of an affected target, which means a well-placed attack on a clustered group can cascade through an entire wave in under four seconds.
Synergy With Ranged Openers
The explosive diarrhea attack works best when the enemy group is already softened, which is exactly the role the shuriken toss was designed for in the first place. The standard combo chain therefore looks like: shuriken toss to scatter and stagger, pistol shot chain to land burst damage on the staggered target, then explosive diarrhea to apply the debuff stack and watch the cascade unfold. This three-move rotation is one of the highest damage-per-second openings in the game, and the official Stick It to the Stickman launch trailer showcases a similar rhythm during the rooftop CEO encounter. If you want to recreate the beat yourself, our Stick It To The Stickman Spinning Punch Combo guide breaks down the input timing frame by frame so you can chain those hits the same way the trailer does.
Telekinetic Strike and Late-Game Burst
The telekinetic strike is the capstone of the shuriken evolutionary tree, and it is unlocked only after you have fully evolved every other ranged move in the family. Tier 1 hurls a single piece of office furniture at the targeted enemy, Tier 2 lets you charge the throw for 1.5 seconds to double the impact velocity, and Tier 3 unlocks a multi-object salvo that throws three items in quick succession. The telekinetic strike occupies the Heavy Ranged slot and is the only shuriken-family move that can damage the helicopter-riding CEO during his airborne phase.
| Telekinetic Strike Tier | Objects Thrown | Charge Time | Damage | Airborne Hitbox |
|---|---|---|---|---|
| Tier 1 — Single Lift | 1 | None | 120 | No |
| Tier 2 — Charged Throw | 1 | 1.5s | 240 | Yes (during charge release) |
| Tier 3 — Multi-Object Salvo | 3 | None | 360 total | Yes (all three) |
The multi-object salvo is what most players build their late-game portfolio around because each of the three thrown objects applies its own stagger, and a fully landed salvo can lock a boss in place for 2.4 seconds, which is more than enough time to follow up with a Tier 3 pistol burst or a Tier 3 mail bomb detonation. The synergy between the telekinetic strike and the shuriken toss is what makes the two moves feel like a complete ranged kit, because the toss handles positioning and the strike handles finishing power.
Build Identity: The Telekinetic Specialist
A telekinetic specialist build typically runs the shuriken toss in slot 1, the telekinetic strike in slot 4, and the office chair throwing and briefcase melee weapon in slots 2 and 3 to round out the coverage. This loadout is more defensive than the explosive diarrhea build but trades raw damage for unmatched crowd control, especially in the Billionaire Bunker game mode where environmental objects are denser and therefore throwable. Community testing on the official Free Lives Discord confirms that telekinetic builds dominate the late-game leaderboards because the chair and briefcase objects can be sourced from the environment itself, which means the build never runs out of ammunition during extended encounters.
Ranged Coverage Comparison and Loadout Recommendations
With seven distinct ranged and explosive moves now in your toolkit, the question becomes which combination to slot into your combat portfolio for a given run. The table below breaks down the most common pairings and the encounter types they handle best, based on aggregated community data from the official Discord and the r/Stickittothestickman tier list repository.
| Loadout Name | Slot 1 | Slot 2 | Slot 3 | Best For |
|---|---|---|---|---|
| Kiting Specialist | Shuriken Toss | Pistol Shot Chain | Machine Gun Volley | Long corridors, open floors |
| Postal Route | Shuriken Toss | Mail Bomb | Explosive Diarrhea | Cluttered rooms, clustered waves |
| Crowd Control | Shuriken Toss | Shotgun Blast | Telekinetic Strike | Tight rooms, boss fights |
| Speedrun Setup | Shuriken Toss | Explosive Diarrhea | Pistol Shot Chain | Time-attack Corporate Ladder |
| Late-Game Anchor | Shuriken Toss | Telekinetic Strike | Machine Gun Volley | Billionaire Bunker, secret ending |
The Kiting Specialist is the safest pick for new players because all three moves are cooldown-based and forgiving of mis-timed inputs. The Postal Route and Speedrun Setup are more advanced loadouts that reward precise timing and perk selection, while the Crowd Control and Late-Game Anchor builds are the strongest options for the final floors and the secret-ending encounter with The Founder in the doomsday vault.
Perk Pairings That Amplify the Shuriken Family
Perks in Stick It to the Stickman stack additively with move tiers, which means a Tier 3 shuriken toss with the right perks can outperform a Tier 3 shotgun blast in raw damage-per-second. The most impactful perks for the shuriken family are Smoke Form (brief invulnerability during projectile flight), Titanium Cranium (headshot bonus damage), Metal Arms (zero weapon swap penalty), and Coffee Sip Buff (cooldown reduction on all ranged moves). Players who slot all four perks into a single build often reach the late game with cooldowns so short that the shuriken toss functions almost like an automatic weapon, which is the cornerstone of the top-ranked meta builds.
Frequently Asked Questions
Does the shuriken toss benefit from the Coffee Sip Buff in Stick It to the Stickman?
Yes, the Coffee Sip Buff reduces the cooldown of every ranged move in your combat portfolio, including the shuriken toss. With the buff active at maximum stacks, the Tier 1 shuriken cooldown drops from 1.8 seconds to roughly 0.7 seconds, which lets you spam the projectile almost continuously during a fight. Pairing the buff with the Tier 3 ricochet volley creates a true room-clearing machine.
How do I unlock the explosive diarrhea attack?
You need to progress the Caffeine Addict archetype to Tier 3, which requires reaching floor 15 of the Corporate Ladder and completing the Espresso Trial side objective on floor 8. The attack is one of the highest damage-per-second area moves in the game and is a favorite of speedrunners, but the archetype investment means you will need to commit to a full run before the move becomes available.
Can the mail bomb detonate the shuriken mid-flight?
Yes, timing a shuriken toss so the star passes through a thrown mail bomb triggers an early detonation that deals roughly 25% bonus damage to every enemy in the explosion radius. This is the cornerstone of the postal route speedrun strategy and requires precise aim because the star travels on a fixed arc. Community guides on the Free Lives Discord recommend practicing the timing on floor 5 before attempting it in a real run.
Is the telekinetic strike necessary for the secret ending?
Yes, the secret ending encounter with The Founder in the doomsday vault requires the telekinetic strike at Tier 3 to interrupt his doomsday countdown ability. Without the move's airborne hitbox, the countdown cannot be canceled, and the run will end regardless of your other stats. Make sure to evolve the move fully before attempting the vault.
What is the best ranged loadout for a new player in Stick It to the Stickman?
The Kiting Specialist loadout, which combines the shuriken toss, the pistol shot chain, and the machine gun volley, is the most forgiving for new players because all three moves are cooldown-based and do not require precise perk stacking. The shuriken toss handles opening damage, the pistol chain extends the combo, and the machine gun volley gives you breathing room when the heat gets too intense.