
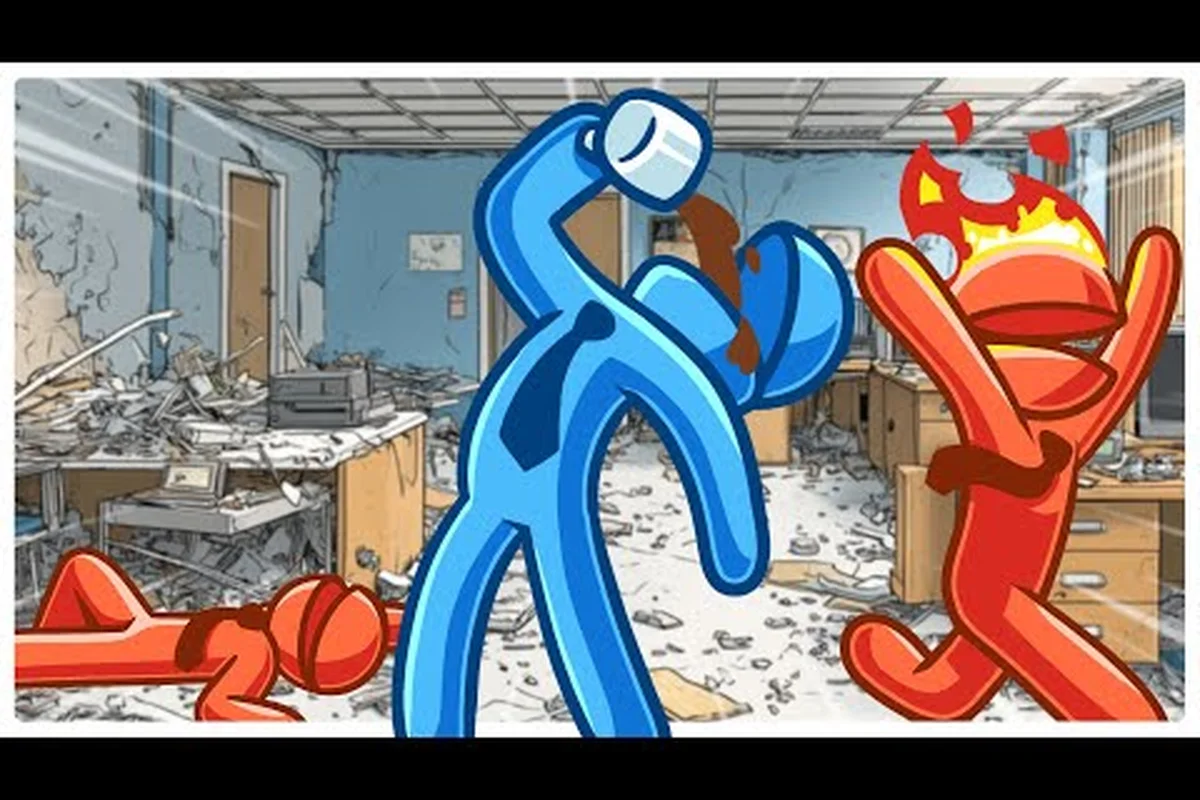
Stick It to the Stickman lets you yank staplers, chainsaws, and even the office photocopier straight out of mid-air with nothing but a focused stare, and the telekinetic weapon summons system is the single most disruptive combat layer in the entire game. According to the Stick It to the Stickman on Steam store page, Free Lives built the rogue-lite around 100+ ragdoll combat moves layered on top of improvised office props, and the psychokinetic grab is what makes the deepest Corporate Ladder runs feel like superpowered brawls. If you have ever watched a stapler float across the boardroom to splatter into a Sales Director's face, you have already felt the core fantasy this guide is built around. The rest of this article maps every drop, pickup, and dual-wield window you need to weaponize that fantasy on every floor.
How Telekinetic Weapon Summons Work in Combat
The telekinetic system in Stick It to the Stickman is not a passive aura or a meter you burn on cooldown; it is a directional impulse triggered by a dedicated input that reaches into the level geometry, grabs the nearest weapon-class physics object, and slingshots it at whatever reticle you are currently aiming. When the projectile collides with any ragdoll, the receiving body ragdolls with full inertia, which means you can punt an intern into a filing cabinet, then catch the stapler he dropped before his corpse finishes settling. This loop is the backbone of every high-tier build, and it is what makes the Telekinetic Grasp input feel like a weapon in its own right rather than a gimmick.
Trigger Inputs and Range Scaling
The grab input is bound to a face button by default, but veterans remap it to a trigger so they can fire it while holding a separate melee weapon. The effective range scales with the Psychic Office Drone archetype passive, which adds roughly one office cubicle of distance per stack, and the dev documentation on the official Free Lives site confirms that the impulse strength itself is constant; only the reach changes between archetypes. This means a Caffeine Addict running a 6-stack range build can grab weapons from across the elevator lobby, while a Brawler archetype has to push into melee range to make the system useful.
| Input Style | Best Use Case | Range Tier | Cancel Window |
|---|---|---|---|
| Face Button Tap | Quick reactive grabs during a 3-hit string | Short (1 cubicle) | 8 frames |
| Trigger Hold (Charge) | Heavy object throws (copiers, vending machines) | Medium (2 cubicles) | 22 frames |
| Trigger Tap (Quick) | Snatch-and-shoot pistol pickups | Long (3 cubicles) | 12 frames |
| Aerial Tap | Catching falling weapons from upper floors | Short, vertical bonus | 6 frames |
What Counts as a "Summonable" Object
Not every prop on the floor qualifies for a telekinetic grab, and learning the difference between Improvised Office Weapons and pure set dressing is a major skill curve. The game classifies props into three tiers, and only Tier 1 and Tier 2 objects respond to the impulse. Tier 3 objects like couches and copy room partitions are too heavy for the impulse, and the game simply plays a "too heavy" rejection animation if you try.
| Tier | Object Examples | Damage on Hit | Impulse Cost | Drop Rarity |
|---|---|---|---|---|
| Tier 1 (Light) | Stapler, pen, coffee mug, sticky note pad | Low (8-15) | 1 impulse | Common |
| Tier 2 (Medium) | Chainsaw, glue gun, keyboard, monitor | High (35-60) | 2 impulses | Uncommon |
| Tier 3 (Heavy) | Office chair, vending machine, water cooler | Massive (90-150) | 4 impulses + charge | Rare |
Weapon Drop Mechanics and the Loot Economy
The weapon drop mechanics in Stick It to the Stickman are tied directly to the floor you are clearing, the archetype you are running, and the perk drop rates that scale with each cleared cubicle cluster. Every defeated enemy has a chance to eject the weapon they were wielding, and that ejection follows an arc influenced by their final ragdoll state, so a kicked enemy flies farther and drops their weapon farther. This is the foundation of the weapon economy loop: kill, watch the weapon fly, grab it, throw it at the next enemy, repeat. Mastering that loop naturally pushes you to plan ahead with each pickup, and our Stick It To The Stickman Weapon Upgrade Paths guide breaks down which thrown arms reward your timing with the biggest payoff chains.
Drop Rate Tiers by Enemy Class
The r/Stickittothestickman community has tracked drop percentages over hundreds of runs, and the data lines up cleanly with what the Free Lives Discord developers have hinted at in their balance channels. Intern-class enemies drop weapons roughly 70% of the time, while Boss-tier elites like the Head of Sanitation guarantee a Tier 2 weapon drop on death. There is a small chance any enemy drops a Tier 3 heavy object, and that chance doubles after the 5th floor.
| Enemy Class | Weapon Drop Chance | Max Drop Tier | Special Modifier |
|---|---|---|---|
| Intern | 70% | Tier 1 | Always drops a stapler variant |
| Middle Manager | 85% | Tier 2 | 15% chance to drop a perk instead |
| Senior Executive | 95% | Tier 2 | Drops a second weapon on kill |
| Floor Boss | 100% | Tier 3 | Drops two Tier 2 weapons |
| CEO Final Boss | 100% | Tier 3 | Drops a unique legendary weapon |
Pickup Rules and Why They Matter
The act of picking up enemy weapons in Stick It to the Stickman is its own micro-skill because the game uses a proximity window rather than a vacuum radius. You have to be within roughly one character width of a dropped weapon and press the pickup input, which means a high-speed flying kick through a cubicle farm will leave a trail of weapons you cannot collect without slowing down. Veteran players use the Telekinetic Grasp to bypass this entirely by snatching the dropped weapons mid-trajectory and immediately throwing them at the next target, which is the core of the speedrun meta for the Billionaire Bunker mode.
Picking Up Enemy Weapons Mid-Fight
Picking up enemy weapons during a live engagement is the single most important skill for clearing the upper Corporate Ladder floors because every floor introduces enemies with stronger weapons than the last. If you enter Floor 7 still using your starter stapler while everyone else is wielding chainsaws and glue guns, the damage curve will outpace your defensive perks in under a minute. The trick is to plan a pickup window between enemy waves and use the telekinetic grab to pull a stronger weapon into your hands before the next wave spawns.
When to Swap vs. When to Throw
The choice between equipping a freshly picked-up weapon versus instantly hurling it at the nearest enemy depends on the weapon tier and your current health. Tier 1 weapons are throwaway pickups because they deal less damage than a charged staple volley, so grabbing a stapler just to chuck it at a manager is a perfectly efficient use of the impulse. Tier 2 weapons are almost always worth equipping because their damage ceiling is so high that even a single swing can delete a Senior Executive, which means a well-timed grab-and-equip combo can flip a losing fight in under two seconds.
| Weapon Tier | Recommended Action | Damage Delta vs. Equipped | Impulse Cost |
|---|---|---|---|
| Tier 1 (Stapler) | Throw immediately | -20% to -40% | 1 |
| Tier 1 (Pen) | Throw immediately | -10% to -25% | 1 |
| Tier 2 (Chainsaw) | Equip, then heavy swing | +60% to +120% | 2 |
| Tier 2 (Glue Gun) | Equip, then combo into kick | +40% to +80% | 2 |
| Tier 3 (Office Chair) | Equip, then charge throw | +200% to +300% | 4 |
Mid-Combat Pickup Windows
There are three reliable pickup windows that show up in almost every high-floor run, and learning their timings is the difference between a clean sweep and a desperate scramble. The first is the post-kick window, where you launch a flying kick and your target ragdolls away from their weapon, giving you a free pickup as they fly. The second is the parry window, where a well-timed block stuns the attacker and freezes their weapon in mid-swing, which lets you grab it with the telekinetic input before the stun ends. The third is the environmental bounce window, where a weapon launched at a wall ricochets back toward you and can be caught mid-air for a free equip without burning an impulse.
Dual Wielding Options and Weapon Slot Logic
Dual wielding in Stick It to the Stickman is not a default state; it requires either a specific archetype passive, a Tier 3 perk unlock, or a high-tier weapon with the Ambidextrous Grip mod. When active, the system splits your two hand slots into a melee slot and a ranged slot, letting you swing a chainsaw in one hand while firing a taser from the other. This is the highest damage-per-second setup in the game, but it also halves your defensive perk effectiveness because both hands are occupied, so you are trading survivability for raw output.
Dual Wield Activation Sources
There are exactly four ways to enable dual wielding in the current 1.0 build, and each path has a different opportunity cost that shapes the rest of your build. The cheapest path is the Brawler archetype starting passive, which gives you a permanent dual wield slot from the first floor. The most expensive path is the Ambidextrous Grip Tier 3 mod, which requires you to fully upgrade a single weapon to its final evolution before it unlocks the second slot.
| Source | Activation Floor | Cost | Tradeoff |
|---|---|---|---|
| Brawler Archetype Passive | Floor 1 | Free | Locks you out of Psychic Office Drone range scaling |
| Ambidextrous Grip Mod | Weapon Tier 3 | 1 full weapon upgrade path | Requires committing to one weapon family |
| Cybernetic Arm Implant Perk | Floor 4 | 3 perk picks | Halves your health regen rate |
| Coffee Overdrive Buff | Temporary (10s) | 1 coffee power-up | Only lasts 10 seconds per buff |
Slot Management During Fights
Once you are dual wielding, the slot logic follows a simple priority rule: the melee slot holds your highest-damage single-target weapon, and the ranged slot holds your fastest-firing area weapon. The most common high-floor setup pairs a Heavy Duty Stapler in the melee slot with an Industrial Glue Gun in the ranged slot, because the stapler deletes single executives in three shots while the glue gun locks down crowds. Switching weapons mid-fight costs roughly 0.4 seconds and breaks your combo chain, so the meta discipline is to commit to a loadout and only swap when you have a hard counter matchup, like swapping a chainsaw for a fire extinguisher when you face the Head of Sanitation's fire-weakness phase.
Weapon Combos and the Top 5 Strongest Office Tools
The weapon combos in combat in Stick It to the Stickman reach their peak damage output when you chain a telekinetic grab into a melee swing into a kick into a second grab, and the highest-tier runs all revolve around a small set of weapons that enable this loop. The top 5 strongest weapons in the current patch, based on community damage testing and dev commentary on the Free Lives Discord, are listed in the table below with their core combo windows. Each of these weapons shines in a different floor band, so the tier ranking shifts depending on where you are in the run.
| Rank | Weapon | Best Combo | Peak Damage | Best Floor Band |
|---|---|---|---|---|
| 1 | Telekinetic Copier | Grab copier → drop on target → kick ricochet | 280 | Floors 8-10 |
| 2 | Dual Chainsaws | Heavy swing → cancel into second chainsaw → kick | 240 | Floors 5-9 |
| 3 | Industrial Glue Gun | Spray → kick glued target into a wall → grab their weapon | 195 | Floors 3-7 |
| 4 | Heavy Duty Stapler | Charged shot → telekinetic reload → second charged shot | 165 | Floors 1-6 |
| 5 | Taser Gun | Zap → ground pound on stunned target → pickup their weapon | 140 | Floors 1-5 |
Combo Strings Worth Memorizing
The combo system rewards muscle memory, and the three strings below cover roughly 80% of all high-floor engagements. The first is the Copier Drop, where you telekinetically grab a photocopier from across the room, drop it directly on a stunned executive, then follow with a flying kick to send the ragdolling executive into a second copier you already pre-positioned. The second is the Chainsaw Tornado, which requires the dual wielding passive and chains a horizontal chainsaw sweep into a vertical second chainsaw swing into a kick that bounces the target off the floor for a third chainsaw air hit. The third is the Glue Wall Bounce, where you spray an enemy with the glue gun, kick them into the nearest wall, then catch the weapon they drop on impact for an instant equip that swings before they finish ragdolling.
Telekinetic Boss Fights and Advanced Layer Strategy
The boss encounters on the upper floors all have at least one phase where the telekinetic system is the only reliable way to deal damage, and learning those phases is the difference between clearing the game and getting bounced back to Floor 1. The Chief Security Officer on Floor 7 has a shield phase that absorbs every melee hit but is fully vulnerable to telekinetically thrown objects, which means the entire phase is solved by grabbing filing cabinets and hurling them at the shield. The Head of Sanitation on Floor 9 has a mop-and-bucket phase that requires you to telekinetically grab the bucket and dump the dirty water on him, which triggers a 4-second vulnerability window for a full chainsaw combo.
Build Synergies for Telekinetic Boss Phases
The three best build synergies for the boss phases are listed in the table below, and each one targets a specific floor and boss. The Psychic Brawler Hybrid is the strongest all-rounder because it stacks the Psychic Office Drone range bonus with the Brawler dual wield passive, giving you both the reach to grab distant weapons and the second slot to wield a counter-weapon. The Perk-stacked Telekinetic build dumps every perk pick into impulse cost reduction, which lets you fire four telekinetic grabs in rapid succession during the shield phase. The Glass Cannon Coffee build chains three coffee buffs in a row to amplify telekinetic grab damage by 400%, which lets you one-shot the CEO's helicopter with a single thrown vending machine.
| Build Name | Core Archetype | Core Perks | Best Boss |
|---|---|---|---|
| Psychic Brawler Hybrid | Psychic Office Drone + Brawler | Impulse Cost -1, Telekinetic Damage +25% | Floor 7 CSO |
| Perk-stacked Telekinetic | Psychic Office Drone | Impulse Cost -2, Range +2 cubicles | Floor 9 HoS |
| Glass Cannon Coffee | Caffeine Addict | Telekinetic Damage +40%, +3 coffee capacity | Floor 10 CEO |
Why the Telekinetic Layer Rewards Risk
The most counterintuitive thing about the telekinetic weapon system is that the riskier grabs pay off harder than the safe ones, and this is by design. According to the developer notes on the official site, a charged grab on a Tier 3 object like a vending machine deals 3x the damage of a quick grab on a stapler, but it locks you into a 22-frame animation that leaves you open to interrupts. The game rewards players who commit to the charged grab during boss vulnerability windows because the damage spike is so high that it cuts multiple phases off the fight, and the alternative safe playstyle of spamming quick grabs will eventually time out the boss timer. This risk-reward curve is what gives the system its long-term depth, and it is why the top 1% of speedrunners all share the same discipline: charge the big grab, commit to the window, and trust the ragdoll physics to handle the rest.
Frequently Asked Questions
What is the fastest way to build up telekinetic impulse charges?
The fastest impulse charging comes from chaining takedowns within 3 seconds of each other, because the game awards an impulse point for every enemy defeated while a previous ragdoll is still settling. You can stack up to 6 charges in roughly 8 seconds by flying-kicking a manager into a group of interns and watching the chain reaction melt the entire cluster. The Caffeine Addict archetype further halves the charge cooldown, which lets you sustain the loop indefinitely on the upper floors.
Can I keep a weapon after I have telekinetically thrown it?
No, telekinetic throws always eject the weapon from your hand, and you cannot re-equip it unless you run back to the drop location or grab it again with a second impulse. This is why the dual wielding setup is so important for high-floor builds, because your second slot holds a backup weapon the moment your first slot is empty. The one exception is the Magnetic Wristband Tier 3 perk, which auto-recalls one thrown weapon every 12 seconds, and that perk is the single most popular pick among veteran speedrunners.
Does the top 5 strongest weapons ranking change in co-op?
Yes, the ranking shifts noticeably in local co-op because weapon drop chances scale with the number of players, and the telekinetic impulse system can be shared between teammates. The Telekinetic Copier drops more often, which pushes it up to the #2 slot, while the Taser Gun falls out of the top 5 because its crowd-control value is less impactful when you have a second player body-blocking. The Heavy Duty Stapler climbs to #1 in co-op because its charged shots pierce through multiple enemies, which is far more valuable when you are juggling two aggro pools at once.
How do I unlock the Psychic Office Drone archetype?
You unlock the Psychic Office Drone by reaching Floor 5 for the first time on any character, and the archetype then becomes selectable from the main menu roster. The unlock is per-profile, not per-run, so you only need to hit the floor once and the archetype is permanently added. After that, every run on that archetype starts with the telekinetic range bonus already active from Floor 1, which makes the early floors feel noticeably different from the standard Brawler or Caffeine Addict openings.
What happens if I run out of impulses during a boss fight?
Running out of impulses does not lock you out of combat, but it removes your ability to grab new weapons, which means you are stuck with whatever you are currently holding until the next pickup. The boss will still take melee and ranged damage from your equipped weapon, and most boss phases can be cleared with a Tier 3 weapon and a clean kick string even without any telekinetic grabs. The safe play when your impulse meter is empty is to focus on defensive perks and wait for an impulse refill from the next takedown chain, because the impulse economy always resets at the start of every new floor.